How to Run a Portable Version of Windows XP, 7, 8, 8.1 from a USB Drive

Windows USBYou ever wanted a Windows to run on a USB hard drive or flash drive, to use on any computer you want? It’s possible :-D. Thanks to WinToUSB.
Here’s how to install a portable version of Windows 8.1 (or other versions, like Windows XP or 7) on a USB hard drive that you can take anywhere.
Note that this is different from installing Windows from a USB drive, which allows you to install Windows on a computer that doesn’t have a CD drive (for that, please check this post). Here, we’re actually installing Windows on a USB drive so we can run it from a drive on any computer you want, and take it with you for troubleshooting, remote work, and so on.

You only need:
  1. A Microsoft Windows installation disc or ISO image – We recommend using Windows 8, that will allow you to use your portable installation on any computer. Microsoft Windows 7 is not as portable and may have driver or activation issues if you use it on other computers.
  2. A USB drive – An external hard drive or a flash drive. USB 2.0 is not recomended (slower). A USB 3.0 driveis the best technology for this end (mutch faster).
  3. WinToUSB – This is the simple program that will walk you through the installation process. Download it from here.
Installation:

This is a very easy to do… Only choose the ISO sourse, the destination disk, and configure the system partitions.

Check it on WinToUse: http://www.easyuefi.com/wintousb/index.html

On my PC it only takes less than 20 minutes, but I’ve read that some users wait an hour to do it.

You will need to make 2 partitions (system partition with +-300MB and a boot partition with the space that you desire – more than 30GB is recomended for Windows 8). You can check this page: http://www.easyuefi.com/wintousb/faq/en_US/What-are-system-partitions-and-boot-partitions.html for more information.


References:

http://lifehacker.com/how-to-run-a-portable-version-of-windows-from-a-usb-dri-1565509124

http://www.easyuefi.com/wintousb/

Samsung Gio (GT-S5660) CM9 – Android 4.0.4

Samsung Galaxy Giocm9After I try to update to CM11 (Android 4.4.2) and see that is not working properly (KitKat is too big for this phone) I decided to install CM9 (Android 4.0.4 IceCream Sandwich) instead.

First you need to know that with this process you will avoid the warranty for your device, and you will do it on your own… I can’t be responsible for the damage that it will eventually do to your device.

I tested in my old device that I brought in 2011 with success. Only the camera doesn’t work.


1 – Root your Gio With Gingerbread 2.3.3:
  1. Download: Update.zip
  2. Copy ZIP file to your SD-card
  3. Turn off your phone
  4. Now, you will have to switch ON your device in the recovery Mode which can be done by holding the Middle button and then Power ON the device by pressing the Power ON button.
  5. In recovery mode, you will see the option called “apply update from SD Card”, select this option and then you will see that the list of files will come from which you will have to select the file which is named as Update.zip
  6. Wait a few seconds (MAX 5 minutes!)
  7. Your phone is rooted


2 – Install ClockworkMod Recovery

The next obvious step after rooting an Android device is flashing a custom Recovery Image. A custom recovery not only helps you flash custom ROMs, but it lets you take backups of your current ROM so in case you mess up with your device, you can easily revert back to the working firmware. The widely popular ClockworkMod Recovery’s available for the Galaxy Gio and the guide below shows how you can install it on your device. Here you go:

  1. You must have rooted your device before doing this procedure.
  2. This will replace your current recovery with the CWM Recovery.
  3. Download the ClockworkMod Recovery CWM 5.0 v2 and copy to the Root (not in any folder) of your SD card
  4. Put your phone in recovery Mode(press: Home button + Power button toghether)
  5. In recovery mode, select the downloaded file “apply update from SD Card”(Use Volume keys to navigate and home button for enter).
  6. Search for the file downloaded “.zip” on your SD-card
  7. Run the update
  8. Reboot

You’ve successfully installed the ClockworkMod Recovery on your device and you should be able to flash custom ROMs and Mods right away!


3 – Flash a CM9 – Android 4.0.4
  1. From this page download the CM 9 firmware file. The password for rar file is www.androidpt.com
  2. Save the Android 4.0.4 OS (cm_9_final3gio-ota-eng.zip) on your computer – just place the file on desktop without unzipping it.
  3. Now, connect your handset with the PC by plugging in the USB cord.
  4. Then transfer the downloaded files from desktop on your phone’s SD card.
  5. Remove the USB cable; the computer is no longer useful.
  6. Turn off your Galaxy Gio.
  7. Enter your Android device in recovery mode.
  8. From recovery select “wipe data factory reset”.
  9. Now return to main menu of recovery.
  10. Up next you have to select “install zip from SD card” followed by “choose zip from SD card”.
  11. Select the cm_9_final3gio-ota-eng.zip; flash the update on your Samsung Galaxy Gio.
  12. Then from the main menu of recovery you need to select “reboot system now” and you are done.

Perfect. You have learned how to safely update your Samsung Galaxy Gio to Android 4.0.4 OS. CM9 custom ROM firmware has been installed on your Android device, so you are done for now. Just give it a try and test the new software.

References:

http://forum.xda-developers.com/showthread.php?t=1111414

http://forum.xda-developers.com/showpost.php?p=20397988&postcount=8

http://www.androidpt.com/index.php?/topic/47870-mudan%C3%A7a-de-rom-do-gio-para-vers%C3%A3o-404/

http://theunlockr.com/2013/03/20/how-to-root-the-samsung-galaxy-gio-gt-s5660/

http://theunlockr.com/2013/03/20/how-to-install-clockworkmod-recovery-on-the-samsung-galaxy-gio-gt-s5660/


Laser Printer: C, D, W, T, M, N, F meaning

mf8550cdnPrinting is a big part of office life, and purchasing or leasing a laser printer is a big investment for any company. It is important to know the printing needs of your office before you start looking at all the dozens of different printers available. You’ll want to consider the type of media you will be printing, the space available where the printer will be placed and how many people in the office will need to print from the same machine.

Once you know the printing needs of your business, it is time to figure out which features come with each laser printer. The laser printer industry has developed an easy-to-understand code that is included in each product name to help consumers quickly identify which features are included with each printer. All those little letters jumbled with numbers do have meaning. Below is a quick rundown on those most commonly used symbols and what they mean.

C (Color)

The ‘C’ means that the printer you are researching is a color laser printer. This letter is a bit redundant since most manufactures list color as part of the product name, such as the HP Color LaserJet Enterprise CP4525dn. However, by looking at the product name (CP4525dn) you can quickly determine that it will print in color.

M (Monochrome)

The opposite of color printers are monochrome laser printers. These printers include ‘M’ in their product name to show that they only print in black and white. The Samsung ProXpress M3320nd is an example of a laser printer that uses the ‘M’ to denote monochrome printing.

D (Duplex)

The D stands for duplexing. Duplexing is the ability to print on both sides of the paper. A laser printer that has a D in its name will automatically flip the paper and print on the other side, like the Lexmark MS710dn.

N (Network)

Using ‘N’ in a product name means that it has networking capabilities, such as the OKI Data C531dn. Networking allows multiple computers to connect to the same laser printer through the use of cables and a router. Networking is especially convenient if your laser printer supports several operating systems, such as Windows, Mac and Linux. Each of these systems can be connected to the same printer, eliminating the costly need of multiple printers.

W (Wireless)

The ‘w’ stands for wireless. This means you can network multiple users to the same laser printer, such as the Samsung Printer Xpress C410w, without the need for cables. Usually this requires you to purchase a special adapter that attaches to the printer. The number of users that can wirelessly connect to your laser printer depends on the amount of memory that is installed in your machine.

T (second paper Tray)

It isn’t often that a manufacturer uses a ‘T’ in a product name. This letter indicates that the laser printer has a second paper tray. All printers have an input tray that holds the copy paper as it waits to be grabbed and used. Many laser printers have additional input trays that attach to the bottom of the printer and hold even more paper. When a laser printer product name includes a ‘t’, like the Lexmark CS410dtn, the machine comes standard with this extra input tray already included.

Now that you know the meaning of those little letters, you will be able to recognize the features of both color, and black and white laser printers at a glance. The more letters that are included in the product name, the more incredible features you will get with the printer. For example, the Brother HL 3170cdw is a color laser printer with duplexing and wireless features, while the Dell 2150cdn can only network with the use of cables. Those little letters are a big help in determining exactly which laser printer you need for your office.

F (Fax)

In general, the letter ‘F’ means the it have FAX.

My opinion

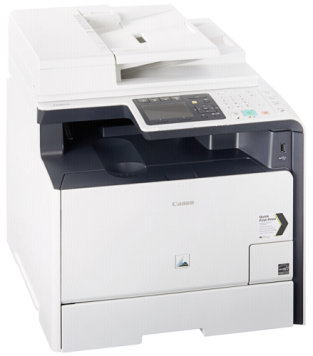
In my opinion, if you are looking for a printer for a small office (5 users), and you need a duplex and network feature, the Cannon MF8850CDN is a very good printer and you can opted for recycled tonners as low as 20€ (for +- 7000 pages). It is a Color printer with Fax, Duplex and Network feature. You can easily scan your documents in duplex mode and send it to your PC. The software is very easy to use.
I’ve this model, and it was the best printer I ever use for small projects.

The average price is 400€. You can find the best seller in Portugal here:

http://www.kuantokusta.pt/informatica/Imagem/Impressoras-e-Multifuncoes/Canon-i-Sensys-MF8550Cdn-p-1-297735

Reference: http://printers.toptenreviews.com/laser/laser-printer-alphabet-c-d-w-t-m-n.html