O GPD Pocket é um micro portátil da Marca Chinesa GPD, criado através de crowdfunding. O hardware é razoável para o tamanho, sendo que o preço pode ser discutível. Funciona muito bem com o Microsoft Windows 10, mas também suporta a distribuição de Linux Ubunto.
Testamos este dispositivo com o Antutu Benchmark e o Disk Benchmark para Windows 10. Veja os resultados…
This is a personal test for 5 different power banks that I buy:
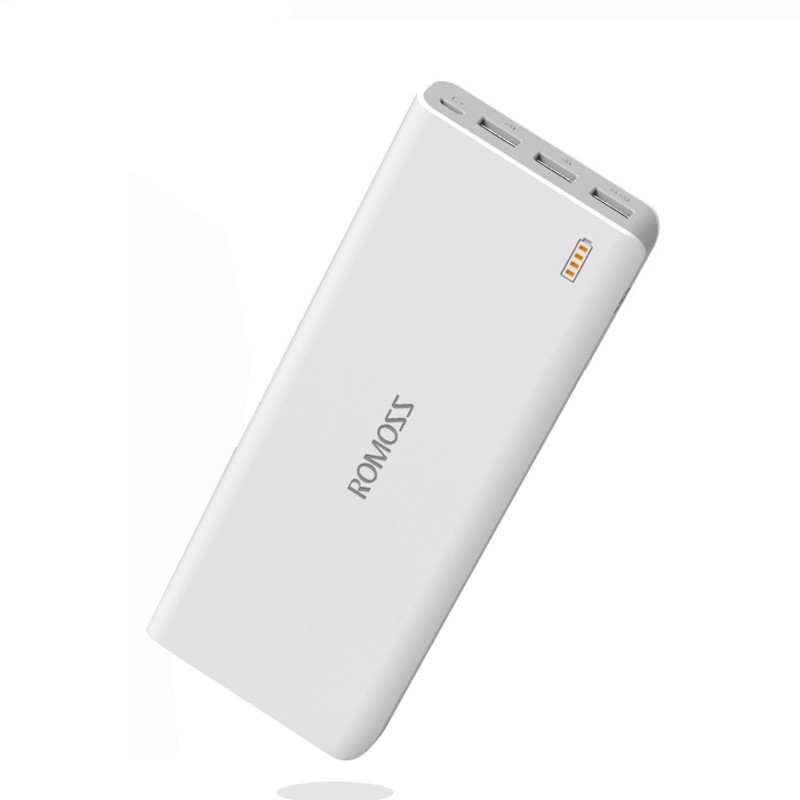
ROMOSS Sense 9 25000mA;
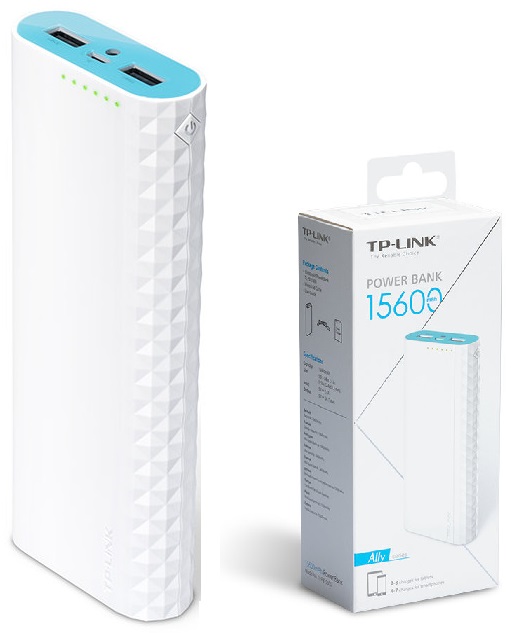
TP-LINK TL-PB15600 15600mA;
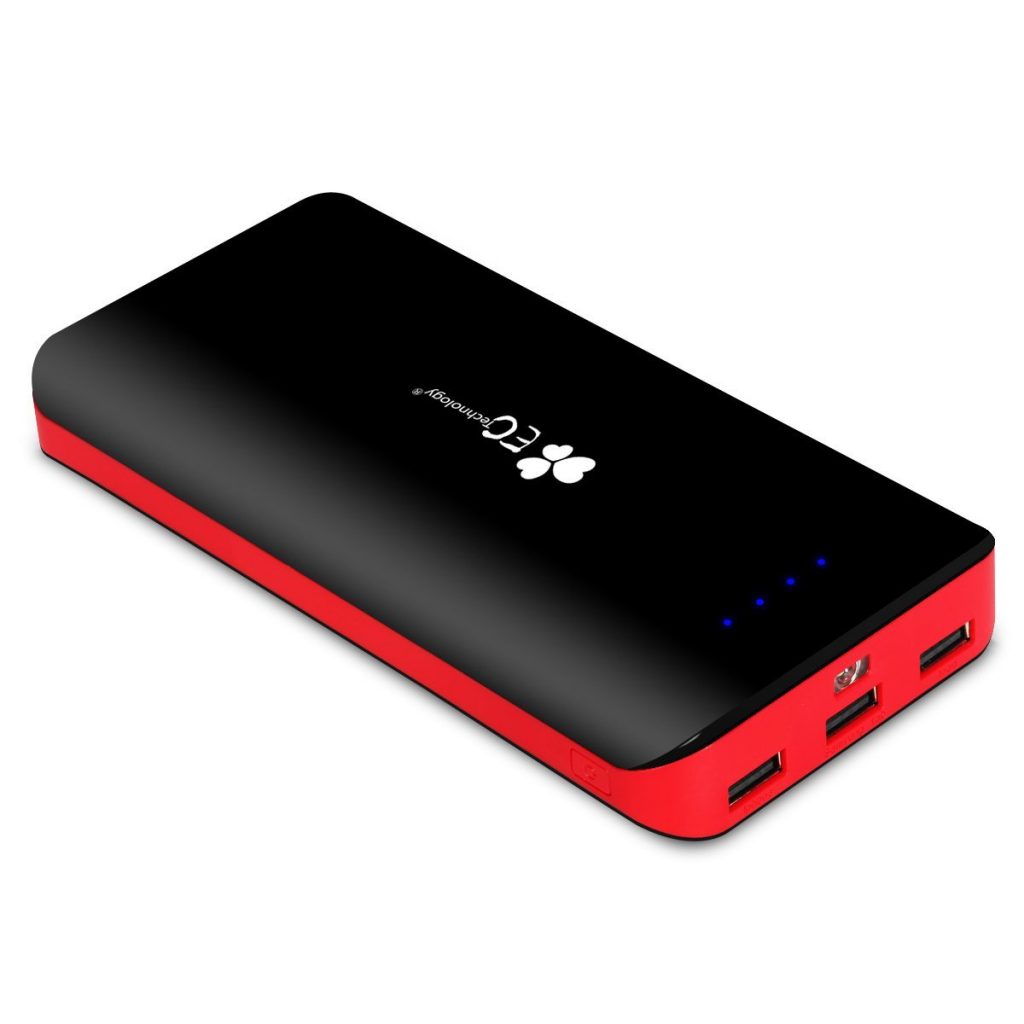
EC Technology PB-EC001 16000mA;
MediaRange MR751 5200mA;
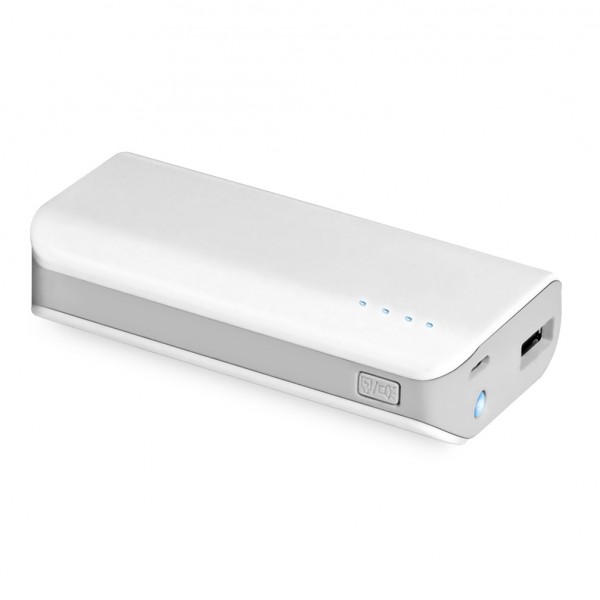
No brand 2200mA.
This test here all done with:
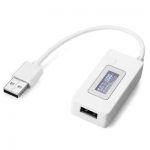
To meter the consumption I use a power meter KCX-017;
For charging Charger 5V, 3A;
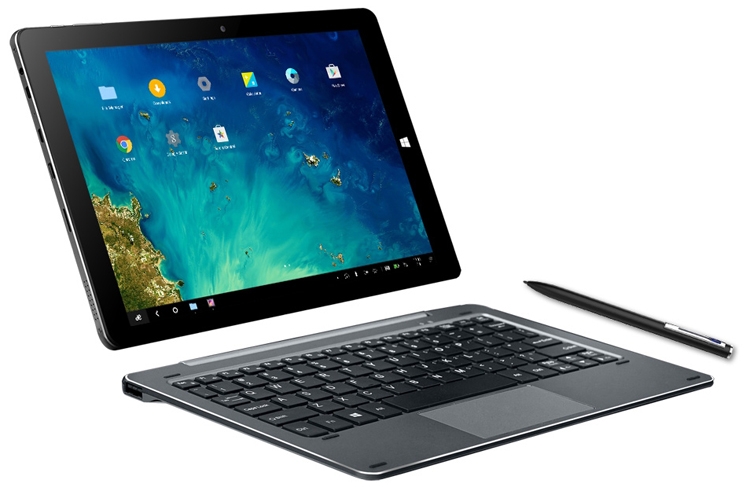
For discharging I use a tablet Chuwi Hi10Pro (Android and Windows 10 tablet) that charges with a USB charging (playing YouTube HD/Full HD videos to drain the battery).
I’ve tested 5 different power banks, 4 of them Chinese (ROMOSS Sense 9, TP-LINK TL-PB15600, EC Technology PB-EC001, and a simple powerbank with a 18650 battery) and one german (MediaRange MR751). All were tested with the same KCX-017 USB meter and add the amount of 20 mA per hour of consumption in my measures.
When I was charging I use the KCX-017 to measure the Voltage and the current of the circuit with the same AC/DC power adapter that can give 5V 3A.
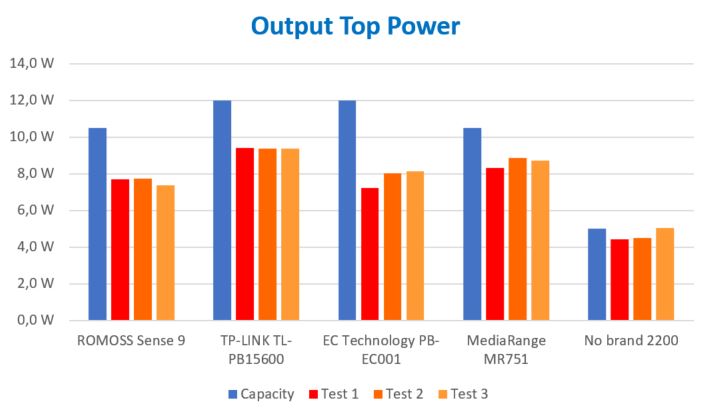
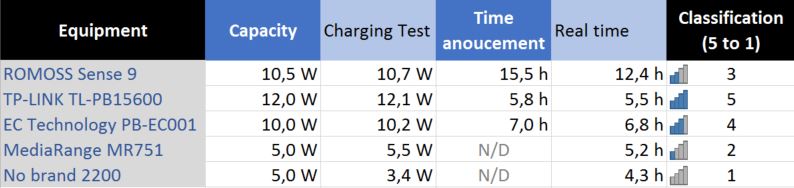
I’ve measured the time and the TOP power provided when I’ve charge the power banks and here is the results:
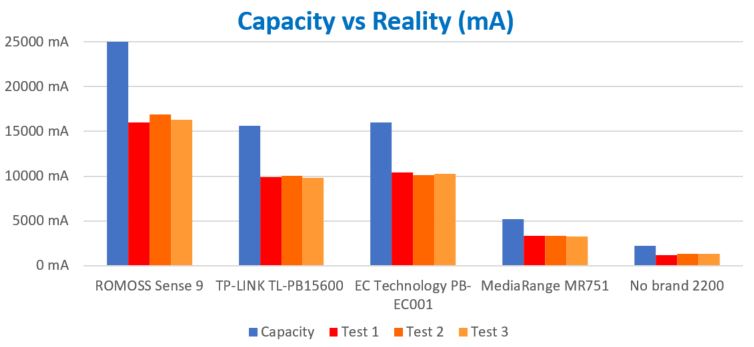
Capacity versus Reality (mA)
In this table I add 20mAh for the meter.
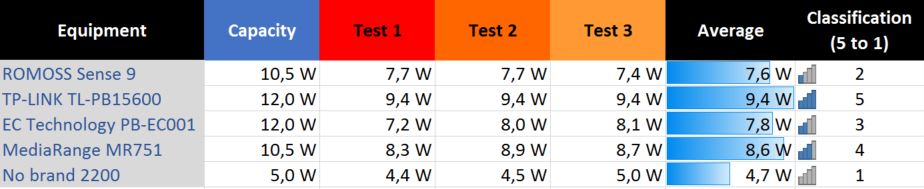
Output top power
Power = Max(V*A)
Charging time
Charging with a 5V, 3A (max) USB power adapter.
Power = Max(V*A)
Final results and opinion:
The most efficient was the one with the highest capacity with almost 66% of efficiency (ROMOSS Sense 9). Meanwhile, the one who charges faster the equipment that it is plugged and charges faster it (capacity vs time) is the TP-LINK TL-PB15600 who makes the winner of these tests.
This was my first Unboxing and Review that I made. I’ve unboxing and test the SmartPlug TP-LINK HS110 with energy monitoring. I hope it will be usefull for you.
https://youtu.be/WltuR0k_3ws
After 2 weeks of testing, I strongly recommended this product:
https://youtu.be/Nso766B1J4c
I recomend and give a 5 stars (5/5) for this product.
This is one of my articles, not based on anything, but in my experience and opinion.
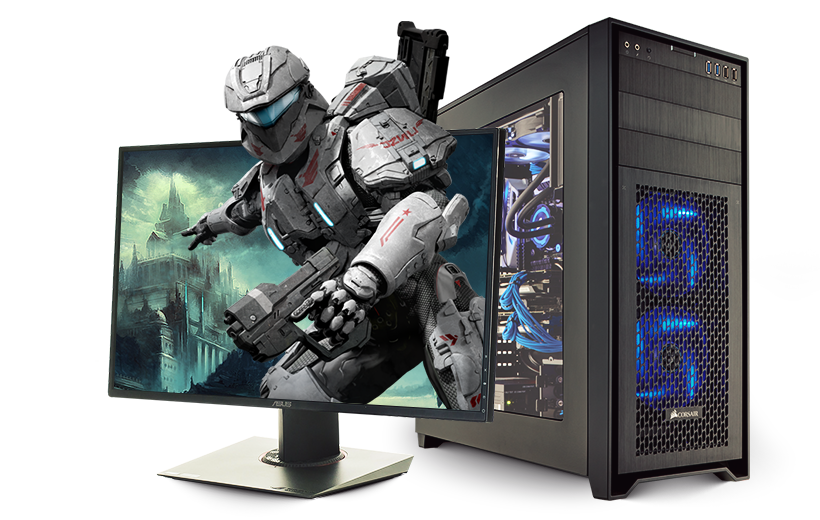
Many users less informed are being eluded by de hard drive capacity, memory capacity, graphic card memory capacity, number of cores of the processor (CPU) or the velocity in GHz (number of instructions per second). This specs aren’t important. You can get in our days a low computer with 1TB (1.024 GB) of hard drive, 8GB of RAM, 2GB of memory card and a 3GHz processor with 8 cores. And do you ask… How should I choose my computer? You always should het this specs in consideration: CPU, RAM, Hard Drive and Graphic Card (this one if you pretend to run the last high ended and popular games). Continue reading “How to choose a computer “for dummies””
You ever wanted a Windows to run on a USB hard drive or flash drive, to use on any computer you want? It’s possible :-D. Thanks to WinToUSB. Here’s how to install a portable version of Windows 8.1 (or other versions, like Windows XP or 7) on a USB hard drive that you can take anywhere. Note that this is different from installing Windows from a USB drive, which allows you to install Windows on a computer that doesn’t have a CD drive (for that, please check this post). Here, we’re actually installing Windows on a USB drive so we can run it from a drive on any computer you want, and take it with you for troubleshooting, remote work, and so on.
You only need:
A Microsoft Windows installation disc or ISO image – We recommend using Windows 8, that will allow you to use your portable installation on any computer. Microsoft Windows 7 is not as portable and may have driver or activation issues if you use it on other computers.
A USB drive – An external hard drive or a flash drive. USB 2.0 is not recomended (slower). A USB 3.0 driveis the best technology for this end (mutch faster).
WinToUSB – This is the simple program that will walk you through the installation process. Download it from here.
Installation:
This is a very easy to do… Only choose the ISO sourse, the destination disk, and configure the system partitions.
After I try to update to CM11 (Android 4.4.2) and see that is not working properly (KitKat is too big for this phone) I decided to install CM9 (Android 4.0.4 IceCream Sandwich) instead.
First you need to know that with this process you will avoid the warranty for your device, and you will do it on your own… I can’t be responsible for the damage that it will eventually do to your device.
I tested in my old device that I brought in 2011 with success. Only the camera doesn’t work.
Now, you will have to switch ON your device in the recovery Mode which can be done by holding the Middle button and then Power ON the device by pressing the Power ON button.
In recovery mode, you will see the option called “apply update from SD Card”, select this option and then you will see that the list of files will come from which you will have to select the file which is named as Update.zip
Wait a few seconds (MAX 5 minutes!)
Your phone is rooted
2 – Install ClockworkMod Recovery
The next obvious step after rooting an Android device is flashing a custom Recovery Image. A custom recovery not only helps you flash custom ROMs, but it lets you take backups of your current ROM so in case you mess up with your device, you can easily revert back to the working firmware. The widely popular ClockworkMod Recovery’s available for the Galaxy Gio and the guide below shows how you can install it on your device. Here you go:
You must have rooted your device before doing this procedure.
This will replace your current recovery with the CWM Recovery.
Download the ClockworkMod Recovery CWM 5.0 v2 and copy to the Root (not in any folder) of your SD card
Put your phone in recovery Mode(press: Home button + Power button toghether)
In recovery mode, select the downloaded file “apply update from SD Card”(Use Volume keys to navigate and home button for enter).
Search for the file downloaded “.zip” on your SD-card
You’ve successfully installed the ClockworkMod Recovery on your device and you should be able to flash custom ROMs and Mods right away!
3 – Flash a CM9 – Android 4.0.4
From this page download the CM 9 firmware file. The password for rar file is www.androidpt.com
Save the Android 4.0.4 OS (cm_9_final3gio-ota-eng.zip) on your computer – just place the file on desktop without unzipping it.
Now, connect your handset with the PC by plugging in the USB cord.
Then transfer the downloaded files from desktop on your phone’s SD card.
Remove the USB cable; the computer is no longer useful.
Turn off your Galaxy Gio.
Enter your Android device in recovery mode.
From recovery select “wipe data factory reset”.
Now return to main menu of recovery.
Up next you have to select “install zip from SD card” followed by “choose zip from SD card”.
Select the cm_9_final3gio-ota-eng.zip; flash the update on your Samsung Galaxy Gio.
Then from the main menu of recovery you need to select “reboot system now” and you are done.
Perfect. You have learned how to safely update your Samsung Galaxy Gio to Android 4.0.4 OS. CM9 custom ROM firmware has been installed on your Android device, so you are done for now. Just give it a try and test the new software.
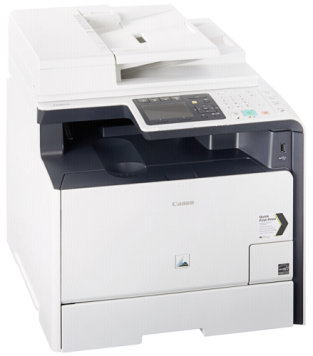
Printing is a big part of office life, and purchasing or leasing a laser printer is a big investment for any company. It is important to know the printing needs of your office before you start looking at all the dozens of different printers available. You’ll want to consider the type of media you will be printing, the space available where the printer will be placed and how many people in the office will need to print from the same machine.
Once you know the printing needs of your business, it is time to figure out which features come with each laser printer. The laser printer industry has developed an easy-to-understand code that is included in each product name to help consumers quickly identify which features are included with each printer. All those little letters jumbled with numbers do have meaning. Below is a quick rundown on those most commonly used symbols and what they mean.
C (Color)
The ‘C’ means that the printer you are researching is a color laser printer. This letter is a bit redundant since most manufactures list color as part of the product name, such as the HP Color LaserJet Enterprise CP4525dn. However, by looking at the product name (CP4525dn) you can quickly determine that it will print in color.
M (Monochrome)
The opposite of color printers are monochrome laser printers. These printers include ‘M’ in their product name to show that they only print in black and white. The Samsung ProXpress M3320nd is an example of a laser printer that uses the ‘M’ to denote monochrome printing.
D (Duplex)
The D stands for duplexing. Duplexing is the ability to print on both sides of the paper. A laser printer that has a D in its name will automatically flip the paper and print on the other side, like the Lexmark MS710dn.
N (Network)
Using ‘N’ in a product name means that it has networking capabilities, such as the OKI Data C531dn. Networking allows multiple computers to connect to the same laser printer through the use of cables and a router. Networking is especially convenient if your laser printer supports several operating systems, such as Windows, Mac and Linux. Each of these systems can be connected to the same printer, eliminating the costly need of multiple printers.
W (Wireless)
The ‘w’ stands for wireless. This means you can network multiple users to the same laser printer, such as the Samsung Printer Xpress C410w, without the need for cables. Usually this requires you to purchase a special adapter that attaches to the printer. The number of users that can wirelessly connect to your laser printer depends on the amount of memory that is installed in your machine.
T (second paper Tray)
It isn’t often that a manufacturer uses a ‘T’ in a product name. This letter indicates that the laser printer has a second paper tray. All printers have an input tray that holds the copy paper as it waits to be grabbed and used. Many laser printers have additional input trays that attach to the bottom of the printer and hold even more paper. When a laser printer product name includes a ‘t’, like the Lexmark CS410dtn, the machine comes standard with this extra input tray already included.
Now that you know the meaning of those little letters, you will be able to recognize the features of both color, and black and white laser printers at a glance. The more letters that are included in the product name, the more incredible features you will get with the printer. For example, the Brother HL 3170cdw is a color laser printer with duplexing and wireless features, while the Dell 2150cdn can only network with the use of cables. Those little letters are a big help in determining exactly which laser printer you need for your office.
F (Fax)
In general, the letter ‘F’ means the it have FAX.
My opinion
In my opinion, if you are looking for a printer for a small office (5 users), and you need a duplex and network feature, the Cannon MF8850CDN is a very good printer and you can opted for recycled tonners as low as 20€ (for +- 7000 pages). It is a Color printer with Fax, Duplex and Network feature. You can easily scan your documents in duplex mode and send it to your PC. The software is very easy to use. I’ve this model, and it was the best printer I ever use for small projects.
The average price is 400€. You can find the best seller in Portugal here:
Disk2vhd is a utility that creates VHD (Virtual Hard Disk – Microsoft’s Virtual Machine disk format) versions of physical disks for use in Microsoft Virtual PC or Microsoft Hyper-V virtual machines (VMs). The difference between Disk2vhd and other physical-to-virtual tools is that you can run Disk2vhd on a system that’s online. Disk2vhd uses Windows’ Volume Snapshot capability, introduced in Windows XP, to create consistent point-in-time snapshots of the volumes you want to include in a conversion. You can even have Disk2vhd create the VHDs on local volumes, even ones being converted (though performance is better when the VHD is on a disk different than ones being converted).
The Disk2vhd user interface lists the volumes present on the system:
It will create one VHD for each disk on which selected volumes reside. It preserves the partitioning information of the disk, but only copies the data contents for volumes on the disk that are selected. This enables you to capture just system volumes and exclude data volumes, for example. Note: Virtual PC supports a maximum virtual disk size of 127GB. If you create a VHD from a larger disk it will not be accessible from a Virtual PC VM. To use VHDs produced by Disk2vhd, create a VM with the desired characteristics and add the VHDs to the VM’s configuration as IDE disks. On first boot, a VM booting a captured copy of Windows will detect the VM’s hardware and automatically install drivers, if present in the image. If the required drivers are not present, install them via the Virtual PC or Hyper-V integration components. You can also attach to VHDs using the Windows 7 or Windows Server 2008 R2 Disk Management or Diskpart utilities. Note: do not attach to VHDs on the same system on which you created them if you plan on booting from them. If you do so, Windows will assign the VHD a new disk signature to avoid a collision with the signature of the VHD’s source disk. Windows references disks in the boot configuration database (BCD) by disk signature, so when that happens Windows booted in a VM will fail to locate the boot disk. Disk2vhd runs Windows XP SP2, Windows Server 2003 SP1, and higher, including x64 systems. Here’s a screenshot of a copy of a Windows Server 2008 R2 Hyper-V system running in a virtual machine on top of the system it was made from:
Command Line Usage
Disk2vhd includes command-line options that enable you to script the creation of VHDs. Specify the volumes you want included in a snapshot by drive letter (e.g. c:) or use “*” to include all volumes. Usage: disk2vhd <[drive: [drive:]…]|[*]> <vhdfile> Example: disk2vhd * c:vhdsnapshot.vhd Note: Physical-to-virtual hard drive migration of a Windows installation is a valid function for customers with Software Assurance and full retail copies of Windows XP, Windows Vista, and Windows 7. Software Assurance provides users valuable benefits—please contact Microsoft Corporation for further information. Windows XP, Windows Vista and Windows 7 installed by Original Equipment Manufacturers (OEM) using OEM versions of these products may not be transferred to a virtual hard drive in accordance with Microsoft licensing terms.
There is many methods to clone a Hard Disk Drive (HDD). Some are expensive and other are free.
I’ve try this solution and love it.
The program is “Redo Backup & Recovery”, based on Ubunto kernel, and it is a free opensource solution that help me to migrate a optical HDD to an SSD Hard Disk Drive.
I make this tutorial to invite you to try this program…
To backup the HDD:
Step 1 – Donwload Redo Backup & Recovery from SourceForge.net.
Step 3 – Reboot your machine and boot from the CD-Drive or USB (to make this change you have to enter on BIOS and set this device to be your first drive to run on the section “Boot priority”
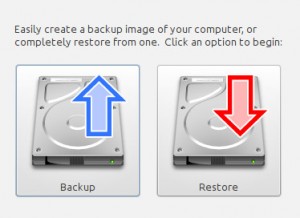
Step 4 – This system is very fast to start. To backup you hard drive you have to choose the “Backup” option.
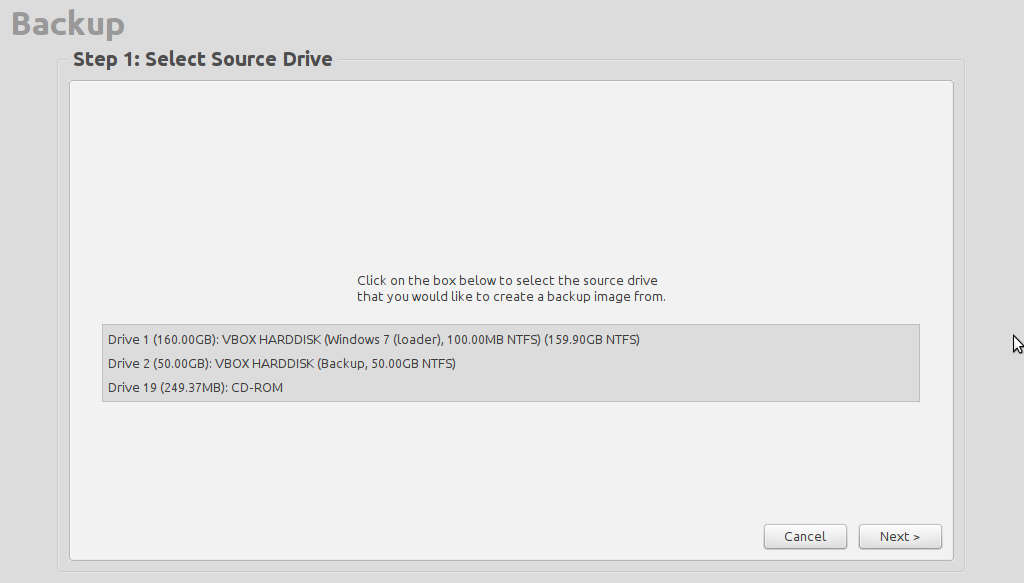
Step 5 – You have to choose the HDD you want to backup and click “Next”. In my example I’ll choose the Drive 1.
Step 6 – You have to choose witch partition you would like to backup and click “Next”. On my example, I’d like to backup the entire drive (select all the partition).
Step 7 – Select where are located the destination drive (locally, on my PC or remotely, on my network or on a FTP server).
On my example, the drive is connected directly on my PC and it is my “Drive 2”. Click “Next” after you choose your destination drive.
Step 8 – Choose where you want to copy the backup files. If you choose “/” you choose directly to root of your destination drive. Click “Next”.
Step 9 – Choose the name of the files. It will show a suggestion of the current date. Click “Next”
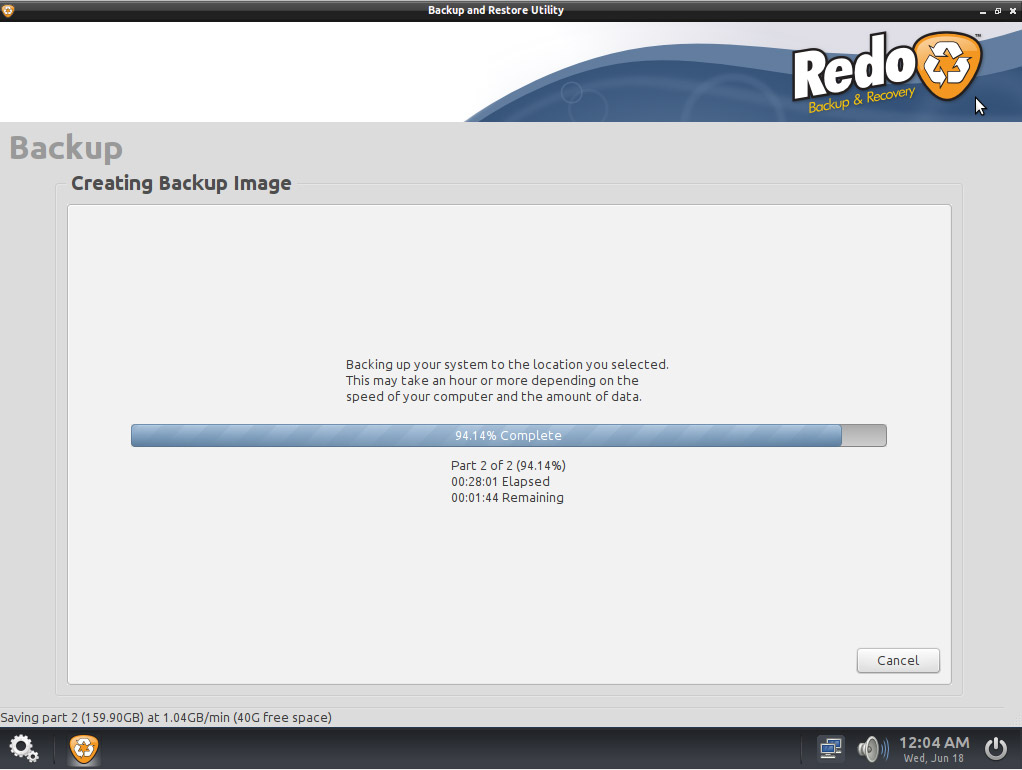
Step 10 – Wait until backup is finished (100%). The time you have to wait until this task is done depend essentially of the velocity of you HDD and the size occupied of your data and if the disk is fragmented or not.
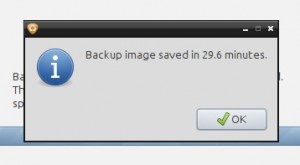
Step 11– Click “Ok” then “Exit”.
Step 12 – Restart your PC. Your Backup is created successfully.
To restore the backup:
Step 1 – Restart you PC like you did on Step 3 of the last topic.
Step 2 – Choose the “Restore” option.
Step 3 – Select the source drive and click “Next”.
Step 4 – Select the file “.backup” you want to restore and click “Next”.
Step 5 – Select the destination drive and click “Next”. It will show you a dialog massage to make shore if you want to proceed, because it will overwrite the data of destination. Make shore if you want to proceed with this task.
To proceed click “Ok”.
Step 6 – Depending of the velocity of your destination drive and the size of your backup, this process will be fast or slow… When this process finish, restart your PC.
I hope this tutorial is useful for you… Please do not do this if you are not sure what it does!


 I’ve tested 5 different power banks, 4 of them Chinese (ROMOSS Sense 9, TP-LINK TL-PB15600, EC Technology PB-EC001, and a simple powerbank with a 18650 battery) and one german (MediaRange MR751). All were tested with the same KCX-017 USB meter and add the amount of 20 mA per hour of consumption in my measures.
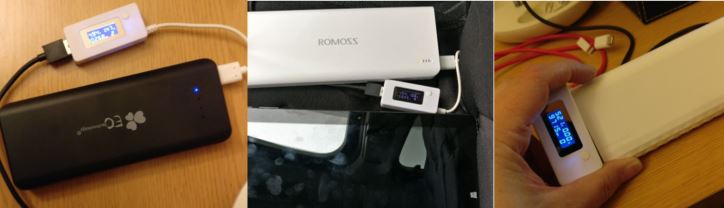

 The most efficient was the one with the highest capacity with almost 66% of efficiency (ROMOSS Sense 9). Meanwhile, the one who charges faster the equipment that it is plugged and charges faster it (capacity vs time) is the TP-LINK TL-PB15600 who makes the winner of these tests.
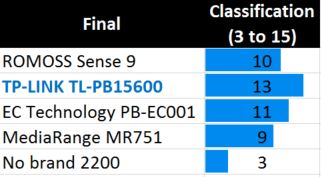


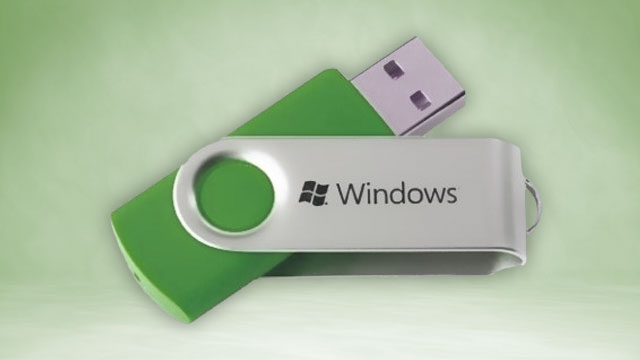 You ever wanted a Windows to run on a USB hard drive or flash drive, to use on any computer you want? It’s possible :-D. Thanks to WinToUSB.
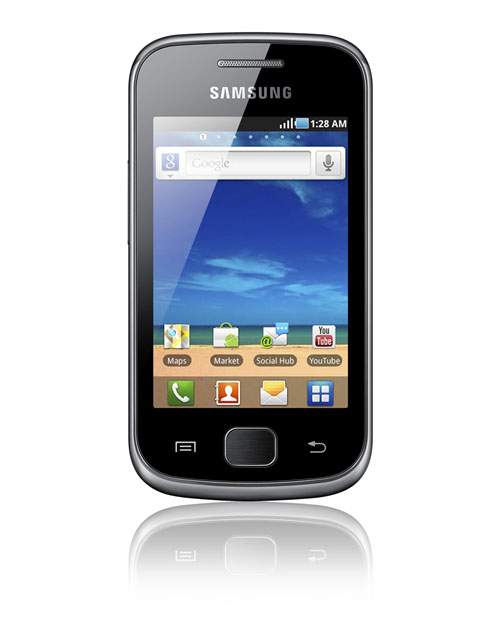

 Printing is a big part of office life, and purchasing or leasing a laser printer is a big investment for any company. It is important to know the printing needs of your office before you start looking at all the dozens of different printers available. You’ll want to consider the type of media you will be printing, the space available where the printer will be placed and how many people in the office will need to print from the same machine.
.png)
.jpg)