Ford Focus MK1 and MK2 Key FOB programming

How to program your remote key to your Ford Mondeo MK1 or MK2?

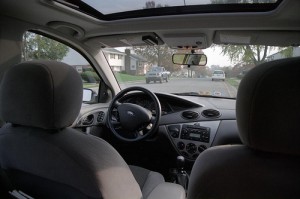
Ford Focus mk1 interiorThis porcedure is on your User Manual… But I will post the procedure anyway:
This procedure only takes you 30 seconds or less…

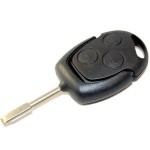
Ford Key

  1. Put the key on “II” position on the ignition…
  2. Move the key to position “I” and then to “II” (4 times in 4 seconds).
  3. You will hear a BIP.
  4. Click at any button and only take it off your finger when you hear another BIP (it will take only 1~2 seconds).
  5. Test if your remote command is working, If not, repeat the procedure or read the manual.

I hope it’ll work for you…

You can see this video that explain how to do it:

Ford Mondeo Key FOB programming

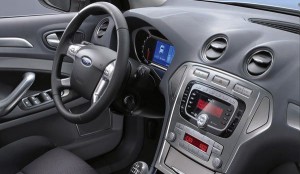
ford mondeo mk4 interiorHow to program your remote key to your Ford Mondeo MK4?
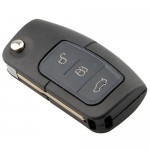
One day, I went to my Ford Mondeo (MK4) and try to open it with my remote key. But it doesn’t open… Then I’ve to open it with the key manually.
I think someone try to open it, and it reset all the remote keys for security.
In this case, you only need to go to User Manual at page 29… But I will post the procedure anyway:
This procedure only takes you 30 seconds or less…

Ford Key


  1. Put the key on “0” position on the ignition…
  2. Move the key to position “II” and then to”0″ (4 times in 4 seconds).
  3. You will hear a BIP.
  4. Than take off the key and click at any button of the remote, and only take it off your finger when you hear another BIP (it will take only 2~3seconds).
  5. Then put the key in the ignition to position “II” and then to “0”.
  6. Test if your remote command is working, If not, repeat the procedure or read the manual.

I hope it’ll work for you… For me it work just fine 😉

CISCO NetRiders 2014 (3/6 dos premiados são da ATEC)

No passado dia 15 de Julho de 2014 ocorreu no país a competição nacional CCNA NetRiders da CISCO.

Os nossos formandos conseguiram o 2º, 3º e 4º lugares.

Fotografia tirada no dia da publicação dos resultados, nos laboratórios CISCO da ATEC Porto, juntamente com o instrutor CISCO Ricardo Marciano.

Os formandos Yaroslav Minakov e o Ivo Ribeiro irão à competição Internacional no dia 16 de Outubro.

Já no ano anterior o nosso ex-formando Luís Ferreira, ficou em 1º lugar a nível Nacional.

Disk2vhd – A utility to convert your physical HardDrive into a virtual HardDrive

Disk2vhd is a utility that creates VHD (Virtual Hard Disk – Microsoft’s Virtual Machine disk format) versions of physical disks for use in Microsoft Virtual PC or Microsoft Hyper-V virtual machines (VMs). The difference between Disk2vhd and other physical-to-virtual tools is that you can run Disk2vhd on a system that’s online. Disk2vhd uses Windows’ Volume Snapshot capability, introduced in Windows XP, to create consistent point-in-time snapshots of the volumes you want to include in a conversion. You can even have Disk2vhd create the VHDs on local volumes, even ones being converted (though performance is better when the VHD is on a disk different than ones being converted).

The Disk2vhd user interface lists the volumes present on the system:

It will create one VHD for each disk on which selected volumes reside. It preserves the partitioning information of the disk, but only copies the data contents for volumes on the disk that are selected. This enables you to capture just system volumes and exclude data volumes, for example.
Note: Virtual PC supports a maximum virtual disk size of 127GB. If you create a VHD from a larger disk it will not be accessible from a Virtual PC VM.
To use VHDs produced by Disk2vhd, create a VM with the desired characteristics and add the VHDs to the VM’s configuration as IDE disks. On first boot, a VM booting a captured copy of Windows will detect the VM’s hardware and automatically install drivers, if present in the image. If the required drivers are not present, install them via the Virtual PC or Hyper-V integration components. You can also attach to VHDs using the Windows 7 or Windows Server 2008 R2 Disk Management or Diskpart utilities.
Note: do not attach to VHDs on the same system on which you created them if you plan on booting from them. If you do so, Windows will assign the VHD a new disk signature to avoid a collision with the signature of the VHD’s source disk. Windows references disks in the boot configuration database (BCD) by disk signature, so when that happens Windows booted in a VM will fail to locate the boot disk.
Disk2vhd runs Windows XP SP2, Windows Server 2003 SP1, and higher, including x64 systems.
Here’s a screenshot of a copy of a Windows Server 2008 R2 Hyper-V system running in a virtual machine on top of the system it was made from:

Command Line Usage

Disk2vhd includes command-line options that enable you to script the creation of VHDs. Specify the volumes you want included in a snapshot by drive letter (e.g. c:) or use “*” to include all volumes.
Usage: disk2vhd <[drive: [drive:]…]|[*]> <vhdfile>
Example: disk2vhd * c:vhdsnapshot.vhd
Note: Physical-to-virtual hard drive migration of a Windows installation is a valid function for customers with Software Assurance and full retail copies of Windows XP, Windows Vista, and Windows 7. Software Assurance provides users valuable benefits—please contact Microsoft Corporation for further information. Windows XP, Windows Vista and Windows 7 installed by Original Equipment Manufacturers (OEM) using OEM versions of these products may not be transferred to a virtual hard drive in accordance with Microsoft licensing terms.

Download: http://download.sysinternals.com/files/Disk2vhd.zip

References: http://technet.microsoft.com/en-us/sysinternals/ee656415.aspx


CCNA NetRiders 2014

No próximo dia 15 de Julho, das 14:00 às 16:30 irá decorrer a competição CCNA NetRides 2014 Portugal.

Contamos assim na competição, com os formandos que tiverem interesse em participar.

As salas disponíveis na ATEC – Porto são as 1.13 e 1.03.

As inscrições deverão ser feitas até ao dia 14 de Julho. Devem seguir as indicações dadas pela CISCO (recebidas por e-mail).

Boa sorte a todos os que vão participar. Espero, mais uma vez, levar ao campeonato Mundial um formando da ATEC este ano.

Clone a Computer Hard Drive

Redo Logo
Redo Backup & Recovery

There is many methods to clone a Hard Disk Drive (HDD). Some are expensive and other are free.

I’ve try this solution and love it.

The program is “Redo Backup & Recovery”, based on Ubunto kernel, and it is a free opensource solution that help me to migrate a optical HDD to an SSD Hard Disk Drive.

I make this tutorial to invite you to try this program…


To backup the HDD:

Step 1 – Donwload Redo Backup & Recovery from SourceForge.net.

Step 2 – Create a boot CD from the ISO file downloaded or create a bootable PEN Drive to do it. To make a bootable pen drive, please read this article: https://pedrovasconcelos.4u.pt/create-an-os-instalation-from-an-usb-pen-drive/ 

Step 3 – Reboot your machine and boot from the CD-Drive or USB (to make this change you have to enter on BIOS and set this device to be your first drive to run on the section “Boot priority”

Step 4 – This system is very fast to start. To backup you hard drive you have to choose the “Backup” option.

01-BackupRestore

Step 5 – You have to choose the HDD you want to backup and click “Next”. In my example I’ll choose the Drive 1.

02-choose-hdd-to-backup

Step 6 – You have to choose witch partition you would like to backup and click “Next”. On my example, I’d like to backup the entire drive (select all the partition).

03-select-partition

Step 7 – Select where are located the destination drive (locally, on my PC or remotely, on my network or on a FTP server).

On my example, the drive is connected directly on my PC and it is my “Drive 2”. Click “Next” after you choose your destination drive.

Step 8 – Choose where you want to copy the backup files. If you choose “/” you choose directly to root of your destination drive. Click “Next”.

Step 9 – Choose the name of the files. It will show a suggestion of the current date. Click “Next”

Step 10 – Wait until backup is finished (100%).  The time you have to wait until this task is done depend essentially of the velocity of you HDD and the size occupied of your data and if the disk is fragmented or not.

9-Backup

Step 11 – Click “Ok” then “Exit”.

10-BackupOK

Step 12 – Restart your PC. Your Backup is created successfully.


To restore the backup:

Step 1 – Restart you PC like you did on Step 3 of the last topic.

Step 2 – Choose the “Restore” option.

01-BackupRestore

Step 3 – Select the source drive and click “Next”.

Step 4 – Select the file “.backup” you want to restore and click “Next”.

Step 5 – Select the destination drive and click “Next”. It will show you a dialog massage to make shore if you want to proceed, because it will overwrite the data of destination. Make shore if you want to proceed with this task.

To proceed click “Ok”.

Step 6 – Depending of the velocity of your destination drive and the size of your backup, this process will be fast or slow… When this process finish, restart your PC.


I hope this tutorial is useful for you… Please do not do this if you are not sure what it does!

Enjoy this free application 😉

Galaxy Gear 2 / Neo (my review)

Samsung Gear 2 / Neo

Here is my review as a satisfied customer of Samsung. I bought a Samsung Gear 2 (about 5 days) and I think is one of the best gadgets I’ve acquired recently.

The interaction between my Note 3 and Gear 2 is fabulous … What I like more ? It is difficult to answer …

What I use most is the step count , setting new goals every day , the handsfree, read emails and messages without having to take the phone and use the timer…

About the autonomy of battery, I’m quite impressed! Lasts about 2 and a half days with a regular / heavy use. When reach 15 % of battery, disables the ability to take photographs. On 5 % only gets to see the hours…

Regarding the camera, obviously was not expecting superb quality (compared with the 13MP Note 3). However, despite having 2MP, the Gear has a very good quality… However it is a feature I’ll pass …

My choice of Gear 2 instead of Gear Neo is due to the fact that the Gear2 have Metal chassis and the Gear Neo plastic chassis… I’ve been with this 2 smartwatch on my arm and chose to spend + € 100 for Gear2.

As for Samsung Apps for now is still much to be desired, as there are only about 40 available, with half of them pay up (every 1 € / each). Just bought one (a calculator) that became a disappointment , because I’ve a quicker head (it has a small screen too much for this functionality).

I got it for 5 days and each day, I see a new App in Samsung Apps. Waiting to see if I can find some really useful… If so, I will publish here (if I remember to do it). However it’s already have a number of applications (bu default), that have proved very useful and interesting. Hope to see more Apps soon!

Create an OS instalation from an USB pen drive

This tutorial was tested with Microsoft Windows 7 Home Premium.

I’ve created a bootable installation of Windows 7 from an USB pen drive.

The steps you should follow to do that:


Step 1:

Windows Key + “R” key;

Type DISKPART “ENTER”


Step 2:

diskpart

  • On the prompt of Disk Part type “list disk” to see the disks of your computer.
    • My USB pen drive is the disk 2.
  • Type: select disk “number of your usb disk” (CAUTION: Make sure that you know which is your USB disk drive).
  • “clean”
  • “create partition primary”
  • “format fs=fat32 quick”
  • “active”
  • “exit”

Step 3:

After configure this you can copy all the files of your Windows DVD (or other Operating System supported by this file system – fat32) to this USB drive. It is able to boot from this drive 😉